
This blog post features step by step directions to help artists to build a 3d creature head. A creature might be a robot, a dragon, a monster, and so much more. Artists have the choice of either displaying their creature head as (option 1) a wall mounted relief or (option 2) a wearable mask.
Also included is a materials list and finished examples to inspire the art making process! Best of all, this project repurposes a variety of materials that would otherwise fill a landfill into an engaging artwork.

Art education connections:
There are many cultures around the world with a variety of 3d mask making technique and materials. I enjoy this YouTube video of Masks of the World to get inspiration. As you explore masks around the world consider:
- What is the purpose of masks in specific cultures? Ceremonial, theatrical, protective, playful, ritualistic, religious, etc.
- How do artists in different cultures create masks? Wood, plaster, food objects, etc?
- Who wears the masks? Performers, dancers, everyday people, etc?
- Where are masks worn around the world? Specific holidays, ceremonies, plays, etc.
- What elements and principles of art are used in the design of masks around the world? Color, line, shape, texture, variety and more?
Another art education connection for this project is the sculptural technique of relief. A relief is a sculpture that has a flat background with dimensional parts that protrude out. Relief artwork can vary in the degree of dimensionality. A relief with a great deal of “jutting” parts is known as a high relief, whereas a relief with minor depth is a low relief.
Materials list:
Below is a list of suggested materials for this project…
- Recyclables, cardboard, found objects, etc.
- Masking Tape
- Scissors
- Hot Glue Gun
- Newspaper
- Gesso/Primer
- Acrylic Paint & Paint materials
- Paper mache. I recommend using Elmer’s art paste. 1 box mixes up a gallon of this stuff so it goes a long way!
- *Optional but recommended* Paint markers for details. This Uni Posca Paint Marker set from Amazon is worth every penny in the quality color they provide!

Prior to diving into building your 3d sculpture, I recommend sketching, brainstorming, and getting inspiration. Even if your plan evolves as you go, it’s helpful to have a starting point.
Step one: Build the armature
An armature is essentially the “skeleton” under the skin of paper mache.
To begin building your armature, find a main base structure for your relief sculpture. I suggest a plastic take out container (as seen in pictures) or a cardboard box. If you wish to make a functional, wearable mask, you will want to cut eye holes out of your base.
Then, use a variety of recyclables to build facial features onto the base. Attach parts using masking tape and/or hot glue. Get creative with how you shape, cut and layer materials to make the details. Strive for dimensionality, as this will make a more visually appealing relief.


Step two: Cover in paper mache!
Once your armature is developed and taped/glued in a manner that it is not super flimsy, you are ready to apply the paper mache.
Cut small strips of newspaper and dip it into the paper mache. Apply to the armature and massage out any air bubbles. Layer to ensure even coverage on the relief sculpture. I recommend at least 2 coats of paper mache, allowing for dry time in between each layer.


Step three: Prime!
Once the paper mache is fully dry and appears hardened to an effective point, I recommend covering your project with a layer of gesso or paint primer. this will provide a nice surface to paint on.


Step four: Paint!
Your relief sculpture really comes to life in this step! Prior to painting, you may want to sketch some details onto the dry, primed surface.
Use acrylic paint to add color to your relief sculpture. Build up larger base coats of color with a larger brush. You will likely need multiple coats of paint to provide proper coverage. Next, continue painting smaller, detailed patterns/textures with a smaller brush. Use black and white paint to emphasize the natural shadows/highlights that exist on your 3d relief.
Explore a variety of painting techniques to add variety and texture. Consider spongeing, stippling, splattering, stenciling, stamping, and more! Paint markers allow for great details as well.

Step five: Decorate!
Once paint is dry, you may want to explore adding additional items to your relief sculpture. Some suggestions include feathers, yarn, faux flowers/leaves, sequence/gems, cut paper, and more!


More process photos:
Below are some more process photos showing the evolution of artist works…


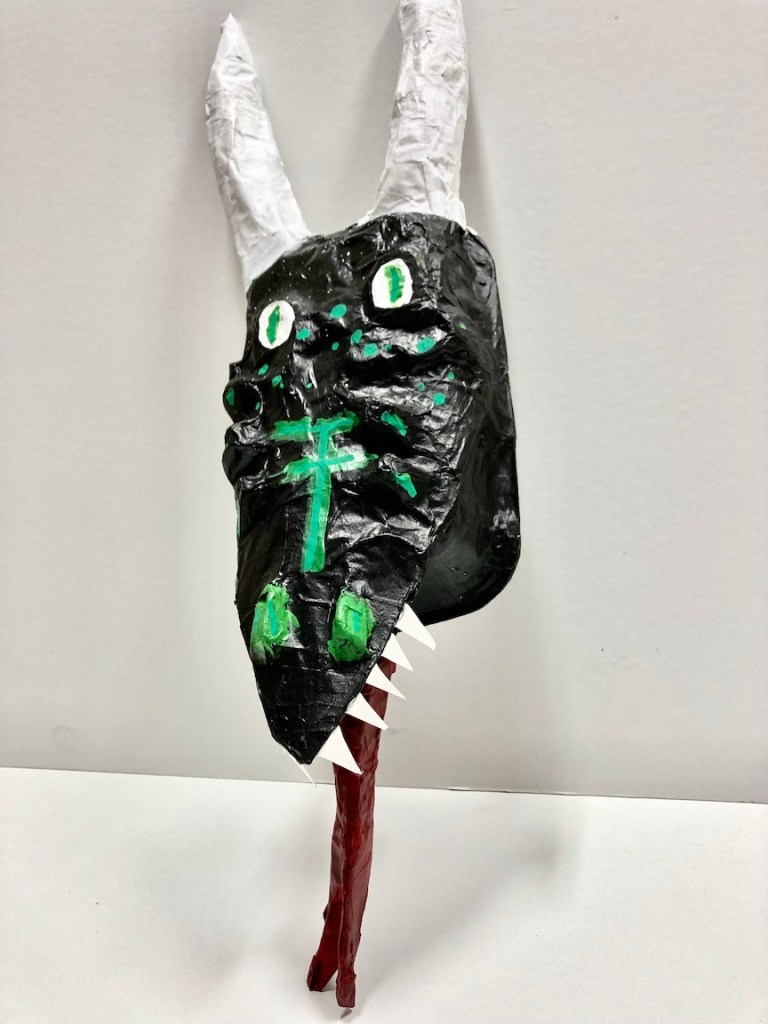
Completed works:
Check out some of the creative, unique works created by my middle school artists. I love how unique each artistic solution is!


Thanks for checking out this blog post. I would love to see your creation if you use these steps to make your own relief or mask of a fictional creature. Feel free to tag me on Instagram and possibly get featured in this site! Also, please follow Make a Mark Studios on Facebook to keep up with the latest posts! Thanks in advance!
-Stephanie Villiotis, creator of Make a Mark Studios